
Draped Flag Dimensions

Draped Flag Dimensions
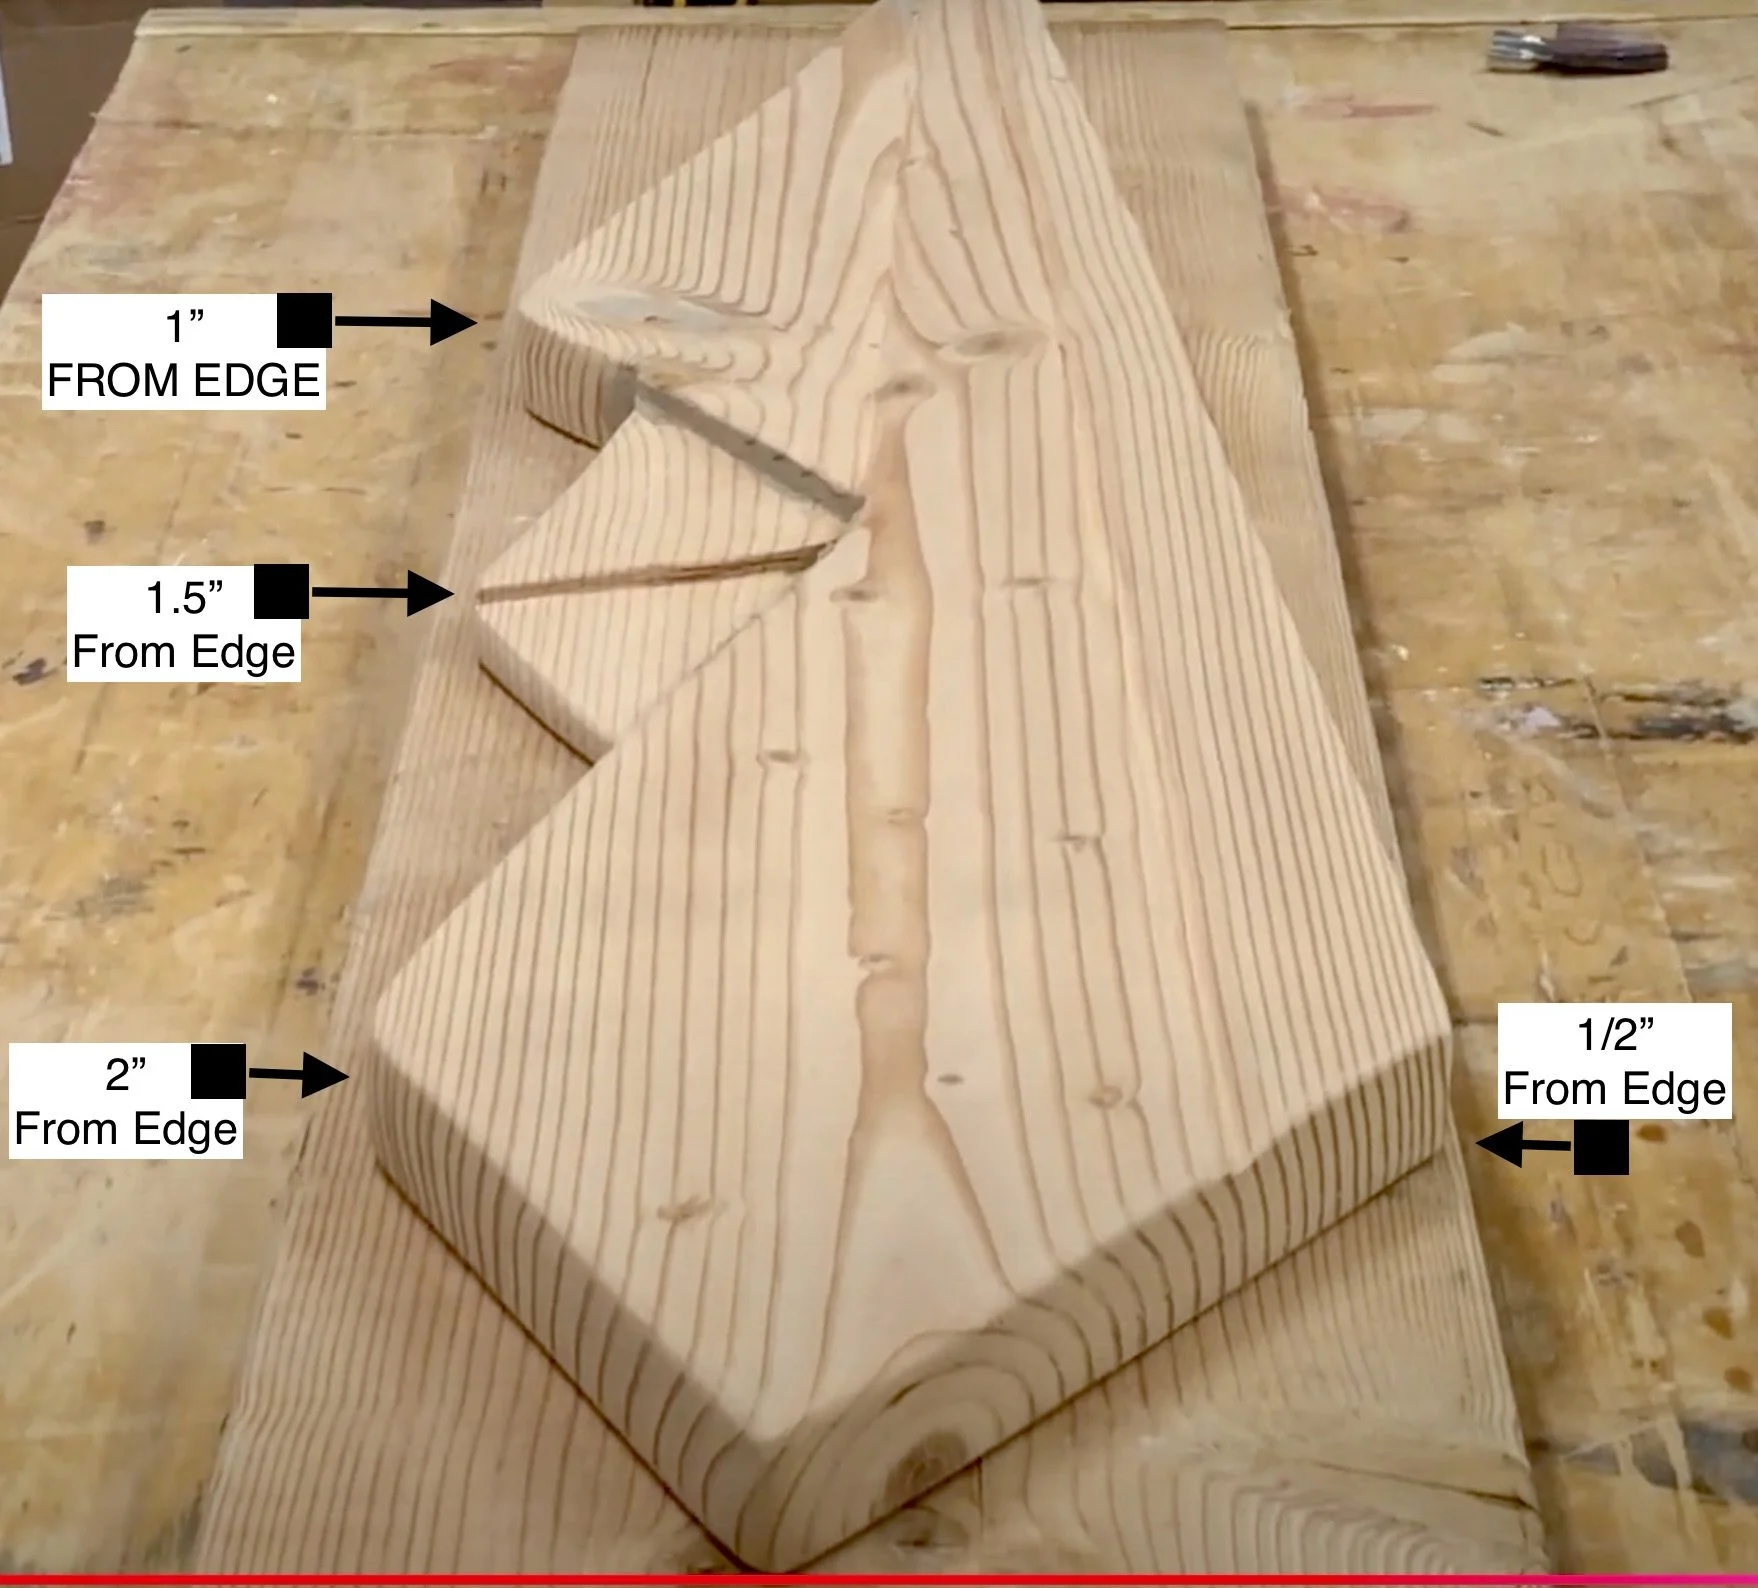
Measurements from edge of 2×12”
How do I measure for the draped flag? I created this quick video.
I have received several questions about the dimensions of building the draped American flag. I have a downloadable PDF with the dimensions all laid out. Also, I created a brief video explaining where to cut, along with the overall layout. The thing to remember about making a wooded draped American flag is that it does not have to be perfect. You will discover that you will change the design of your flag many times. These dimensions I have created are simply guidelines. Have fun with it, and you will enjoy building each flag.
Things I have learned after making over 20 Draped American flags:
1. The Light Blue Stain Layer (The "Depth Shortcut")
If you drench the wood in deep, heavy blue stain, the pigment sinks deep into the grain. To get back to clean, bright white wood for the stars, you are forced to dig a deep trench. By keeping the coat incredibly light, you only have to take off a fraction of a millimeter of wood to reveal the bright contrast underneath. Less digging means less fatigue and fewer chances for the tool to slip.
2. High-Detail Micro Bits
Using the smallest engraving or carving bit (like a Dremel #105 or a tiny diamond cone burr) is the secret to getting sharp, crisp 72-degree interior angles on a star. Large bits turn the sharp points of a star into rounded blobs. It takes patience, but you can't rush precision.
3. Lower Speeds = Total Control
Many people make the mistake of cranking a Dremel up to 30,000 RPMs for everything. On tiny, intricate cuts like star points, high speeds do two bad things:
The Bit "Walks": At ultra-high speeds, a tiny bit behaves like a wheel and will violently grab the wood grain and jump right out of your stencil line.
Friction Burns: High speeds friction-burn the wood, leaving ugly black charring inside your freshly carved stars.
Slowing it down gives the micro-flutes on the bit time to actually slice the wood fibers rather than just grinding and burning them.
Pro-Tip for the Shop: If you're freehanding with that tiny bit at a slower speed, pull the tool toward you like a pencil rather than pushing it away. You'll have double the hand stability.